A troublesome stamp.....
 This stamp was a freebie but I really love the image and was determined to make a card with it.
Unfortunately it was one of those troublesome ones that I just couldn't get to stamp properly. Here are some attempts....(!) Doesn't really show in the photo's - or perhaps it will if you click on them and enlarge them- but there was always a section that didn't come out, no matter what I did!
 Also, I really wanted to use my new ProMarkers :) but found out the hard way that these make the ink run, even if it says it's permanent, waterproof ink, because they are alcohol pens, Helena, and that's what they do- D'OH!!! So I have now ordered a Stazon ink pad, which should be ok with them.... meanwhile, I stamped and embossed the image (above photo) and coloured over the embossed lines. I used a ProMarker Blender to make the grass fade away a bit at its edge, then rubbed an inkpad round the edge of the card.
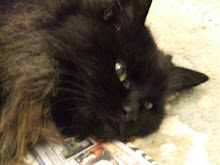
 Don't ask about the monkey nut on the coffee table, here. I have no idea what it's doing there. We buy them to take to the park and feed to the squirrels, but...????
Still wanting to play with my new Markers, I decided to flip the procedure: I scribbled colours over a piece of card (as with the background layer on the card above) and then stamped on top. I used a ColorBox Fluid Chalk inpad for this (in French Blue) and er.... it stamped the image perfectly! Oops! Ah well, I guess this proves it isn't the stamp, it's me!!! LOL!
 I inked round the edge of the card with the same inkpad.
I really like this! So I used it to make a card with, and decided to write to an old friend, Mikiko, with it. She wrote to me at Christmas and I owed her something.... she is very good at Japanese paper folding so I wanted to do something special....
 You can get free template downloads like this from www.byDonovan.com
 I mounted the image on an A5 piece of purple card, and added some glittery bits with a clear Sakura Sparkle pen.
 I made a wrap for the card by punching a strip of vellum and securing it with a shaped paperclip.
 This is how the folder closes... then it went into an envelope for sending. I hope she likes it :)
I'm off for dinner now. I'm cooking chilli :)
(TIP: add a few teaspoons of unsweetened cocoa! YUM! It really helps lift it.)
Then I need to update the shop. Here's a taster of what's going in:
 Thanks again for all your comments! I love reading them :)