Juggling life through a bi-polar lens. Sometimes up, sometimes down. Mostly trying to tread water in the middle. Creating a likeness to a normal life. Whatever "normal" is...

Thursday, 11 June 2009

A review of things, and a beary cook

Starting this blog was, I thought, a way to monitor how the ups and downs of bi-polar affect my creativity. And vice versa. If I am low, can I still draw? And if I can, do I draw better or worse when low or high?

I think the answer might be similar for both highs and lows- it is definitely more of an effort because, whether high or low, it is more difficult to concentrate. The outcome is different though- when high I need to pull back, create a bit less, as indulging in every whim my hyper brain wants to do just pushes me higher and higher. And 'high' does not mean happy, giggly, without-a-care, dance around and sing. 'High' can also mean shakes, racing thought, paranoia, hallucinations, palpitations and chronic fear. Not good!

When low, however, though it is an enormous effort to get the pencils out, it does help me if I can do it. It lifts me.

I suppose this means I have confirmed what I had wondered- that arty stuff lifts mood. It isn't always a good thing though!

*** *** *** *** ***


I have been low lately, which I think is quite a hormonal thing at the moment. But also, I seem to have a lot of worries at once; my mother's health, my cats' welfare, helping to get mum moved up to Essex so that we can all keep an eye on her.... the actual work of finding a place for her, and getting her old place fixed up so she can sell it, well it's just starting to hit home how much hard work this is. On paper it's all a great idea and exciting. In reality it's phone calls, planning, worry. Mum's memory isn't great these days, despite that she is only 67. So most evenings I am on the phone explaining stuff that I've explained 6 times before, whether it is to do with the cats' food, or how to write a cheque.

To turn to doodling seems an unimportant, frivilous pastime under the circumstances. But I steered myself into my craft room on the grounds that it is good for me. Must try to stop the downward spiral. Blogging is good too, as it is a way of keeping in touch with people 'out there'. I have to tell you, I feel so lonely sometimes. I was up last night in tears again. The slightest thing upsets me at the moment. Like I said- hormones! I wept at finding a dead woodmouse in the garden this morning. So tiny and helpless and perfect he seemed. The world seems cruel and horrible.

*** *** *** *** ***

Father's day is coming up, so I turned my attention to that.
My Dad was a Head Chef in the Royal Navy, so I thought a Beary cook would make him smile. The background 'cupcake' paper was free in a magazine. I wrote the greeting in the same fake snow stuff that I had used on Christmas cards last year. Still had a drop left. I wanted it to look like icing. I like the way it looks on the spoon, too! I coloured the Bear and all his accessories in water colour paint. I wrote Dad's initials on the apron.

Yeah, I reckon he will really like this one!


Monday, 8 June 2009

More pootling....

...So I cropped that picture thingy I did the other day, and made it into a card:Watcha think?
Certainly looks better smaller, I think.
I punched the flowers out of some of the remaining paper. I only did 6 as this punch is INCREDIBLY hard to press down! I hate punches like that! I think you should be able to try them out in the shop. LOL!

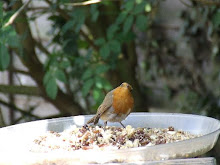
Looking out the window, I spotted this wee fella on the rosemary. Wasn't sure if he was nimbling seeds or insects. Cute, isn't he? Wouldn't pose properly for me though :)...that little distraction got me to dig out this, which I bought about a month ago and still hadn't done anything with. It's a big sheet of gift wrap from Paperchase. Decent weight paper, too, and tons of it for £1:OK £1 is a lot for a piece of wrapping paper that will end up torn up and ignored, but not if you use it in other ways. I've seen craft stamps around with similar bird cage designs on, and this is a much cheaper option to those! Here's the card I made with some of it this afternoon. I used bird stamps from my growing collection of stamps received free with magazines :)I quite like it :) Here's the inside:
Next, here is one I put together as an anniversary card for someone. Can't say who in case they come here and see it. Ha.I had the topper ready a few weeks ago, so it was just a case of deciding on a background. In the end I thought just using a plain brown card was enough.Some swirls inside and a 'congratulations' stuck onto it:
It was nice to do a bit of crafty pootling. I am feeling EXTREMELY hormonal (horMOANal?) right now and I needed calming down. LOL!

Finally, I had run out of blank ATCs. Rather than buy some I thought I'd just cut up some card. They have to be 3.5 x 2.5 inches. Yeah, I know, if I have lined them up I'd have got more out of a sheet of card. But where's the fun in that?I coloured them all with ProMarkers and cut them out. Now I have a wee pile of multi-coloured blank ATCs. Far less frightening than a blank white canvas. You never know, I might even produce some completed ones some time.
Wouldn't it be nice to get a swap going?
Hmmm... I wonder if we could so that... any ideas?

Sunday, 7 June 2009

Doodling a mystical cat picture :)

I saw this method of building a picture demonstrated on TV so I thought I would have a go. I took photo's as I went along, just in case it turned into something that I'd want to remember how I did. If you see what I mean. Ha!

I sat outside in a warm woolly jumper, determined not to let my cold make me miss all the sunshine. A mug of hot tea was essential, though!

First draw lines, freehand, too and fro across the paper.
Don't do zig-zags or sharp bends.

Then colour each shape with water-colour pencils.
Wash water across each shape...
Now take a stamp and two pieces of coloured paper.
No surprise here... I chose a cat!!!

Stamp your chosen shape onto each piece of coloured paper and cut them out.

Layer the shapes together and slice up....

Then fit the shapes back together, alternating the papers.
Stick onto the painted background...

Have a look at the background. Any shapes you'd like to highlight? Use glitter, glitter pens or anything you have to hand.... I spotted that a few of the lines had formed a star... I outlined this in glass outliner....
I went over some of the horizontal lines, too....

Add another quirky stamp somewhere... I chose hearts....
Added some glitz...

The finished pic....

Hey ho!
It filled an hour or two and was quite relaxing to do. I think it would have looked better if it had had a more limited colour pallette. I'll remember that next time! I might crop it, and put it onto a card. Or maybe cut it up into ATC's. What do you think? Why not have a go?

Saturday, 6 June 2009

Ooo! Ooo! I won! I won!

Sharon Duncan Craft is a nice online shop that I've had a link to in my left-hand column for ages now. I love this shop because it has free UK p&p so I don't feel put off ordering if I only want a few things. It also gives more info' on the products than many other sites, which I need as lots of craft tools and materials are still new to me.

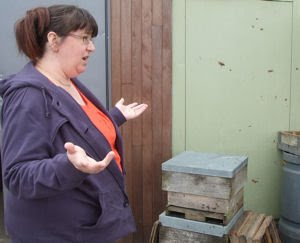
Anyway, I'm signed up to their email newsletter and recently entered a caption competition in it. This is the competition photo- it's Sharon, talking to some bees! Below is my wining caption :)

"YOU'RE busy! You should see what I have to do in a day!"

I don't usually win anything! At least, I can't remember the last time I did! So I'm all excited now. The prize is a Goody Bag. YIPPEE!!!!!! It's really given me a lift, as I've been laid up with another rotten cold this week, all coughing and achey, and playing havoc with my asthma. Bleagh. Now I have something interesting in the post to look forward to. Thanks, Sharon!!!

Monday, 1 June 2009

Catch up on cards....

Here are some cards I've made in the last couple of months. I haven't posted them before because I'd wanted them to reach their recipients before I showed them. Erm, then I forgot :)

This first one was for my partner's youngest nephew, Darragh, in Ireland (several months ago!):Funny, that little cat inside looks quite like him, I think! Same "who me?" expresion!
This one was for another nephew, in Scotland. He's a Celtic Football supporter, so I decorated the bear's shirt accordingly:
The card itself was a plain white embossed one but I used a wash of metallic green watercolour paint to tie it in with the Celtic theme and also to highlight the swirls.

The bear sits proud of the card, on little foan pads. The shirt is stamped separately, coloured and placed on top, threading the right paw through the sleeve! An unexpected bonus of this is that you can get the paw to "hold" something. I couldn't decide what to give him, so I chose these "accessories" and put them in a bag inside the card!
I enjoy decorating the inside of my cards (if I remember! D'oh!):
I do hope he got it, and liked playing with it!


This next one was for my partner's Dad, who plays bridge. I used a pattern from a book I've used before for similar stitched cards; Embroidery on Paper for Every Occasion by Joke and Adriaan de Vette.
I used orange felt for the matting and the background paper -very appropriate!- just happened to be the free gift in that month's Creative Cardmaking.
I sewed onto plain white hammered card. I had a little difficulty- must remember to use thicker card as otherwise the stitching holes act like perforations! I had to glue a line of them at the back, as they were causing the card to tear, but from the front it wasn't noticable. Phew!

Here's the inside:

Next, this was the birhtday card I made for my partner's Mum, Oonagh.
I'd picked up that she prefers dogs to cats, hence the unusual lack of cats!!!

The dogs were an outline sticker. I stuck them onto a piece of very heavyweight white card. I used my Letraset Pro-Marker pens to colour them and draw in some grass and sky. I also used one of these pens on the torn edges of the white card.
The Pro-Marker blender is a great tool and you get some fascinating effects with it. E.g., I went over and over the blue sky with it to create a cloudy effect.


The background paper was a free download from Crafts Beautiful.

I used a Long-Reach Ribbon Thread Punch to make little rectangular holes down one side of the card, then threaded coral coloured organza ribbon through them. The Happy Birthday greeting was another sticker.
I wasn't happy with this next card, so it is still sitting in a box here, unsent.
If you know someone who would like it, let me know!
The ribbons and leaves were a gift from Julie :) and the Flower Fairy tags were a free gift with a magazine. (I'm sorry I didn't do better with your lovely gifts, Julie!)
This next one is my most recent card and was made for my partner's niece, Yolanda. She is a very "pink" little girl!!!
I used an A4 piece of heavyweight purple card, folded in two. That nice flowery background paper is by SEI and is called Doodley-doo girl doodled daisies. -Now say that thirty times in a row!
The dress and slippers are by MIC Craft. I found them at Sharon Duncan Crafts.
I added some crystals to the slippers :)
I had to be careful that it didn't tear or fall to pieces when an eager young lady tore open the envelope, so I wrapped it in tissue and secured it with a butterfly sticker. The envelope I used was made of India Cotton so was a bit stronger than the other A5 ones I have. PaperChase sell these for about £3 per 10. I added a swirl and another crystal to the back to the envelope too :)


There was another card, too, but I can't find the photo!